What problem is this solving?
We want to run our code on an HPC cluster. But the problem with clusters is that they usually do not connect you to the high-power nodes directly. When you first login to your cluster account via SSH, you get in through something often called a Login Node. Login Nodes are not as powerful as you might expect. They are just a gateway to get on the HPC and request for dedicated more powerful Compute Nodes. The connection to the Compute Nodes are managed by a workload manager on the HPC like the famous Slurm Workload Manager.
The typical way to connect to high-power nodes of a cluster.
It is not convenient at all to use a cluster in this way for typical usage. It will work fine for running small scripts. You can use the srun command to run a script inside the Compute Nodes. You also have the salloc command which is a bit more convenient because it upgrades your current SSH terminal to run on one of the Compute Nodes; this means you do not need to write srun every time you run your scripts but you can run commands on the terminal as before and they will all run on the Compute Nodes.
These tools are very fundamental and powerful but way too complicated and inconvenient for basic usage of a normal customer.
We are going to change this!
Of course, there are much more complicated things you can do with a cluster (storage, parallel computing, ...). But what we want here is just to have our code run not on our computer but on the more powerful Compute Nodes on a cluster.
Solution
Prerequisite
Before starting, you should make sure you have installed the latest version of Visual Studio Code.
It is also assumed that you have completed all the necessary steps described in the Draco cluster’s wiki to setup your SSH connection such that you are able to write
ssh dracoon your terminal and connect to the cluster. For the setup to work smoothly, you need a bit of SSH. So try to make yourself comfortable with that by walking through the wiki.
Step 1: Remote connection through VSCode
The first step is to check if VSCode and the required extension is working. For that, open up VSCode, go to the extensions tab, search for Remote Development and install the Remote Development extension pack.
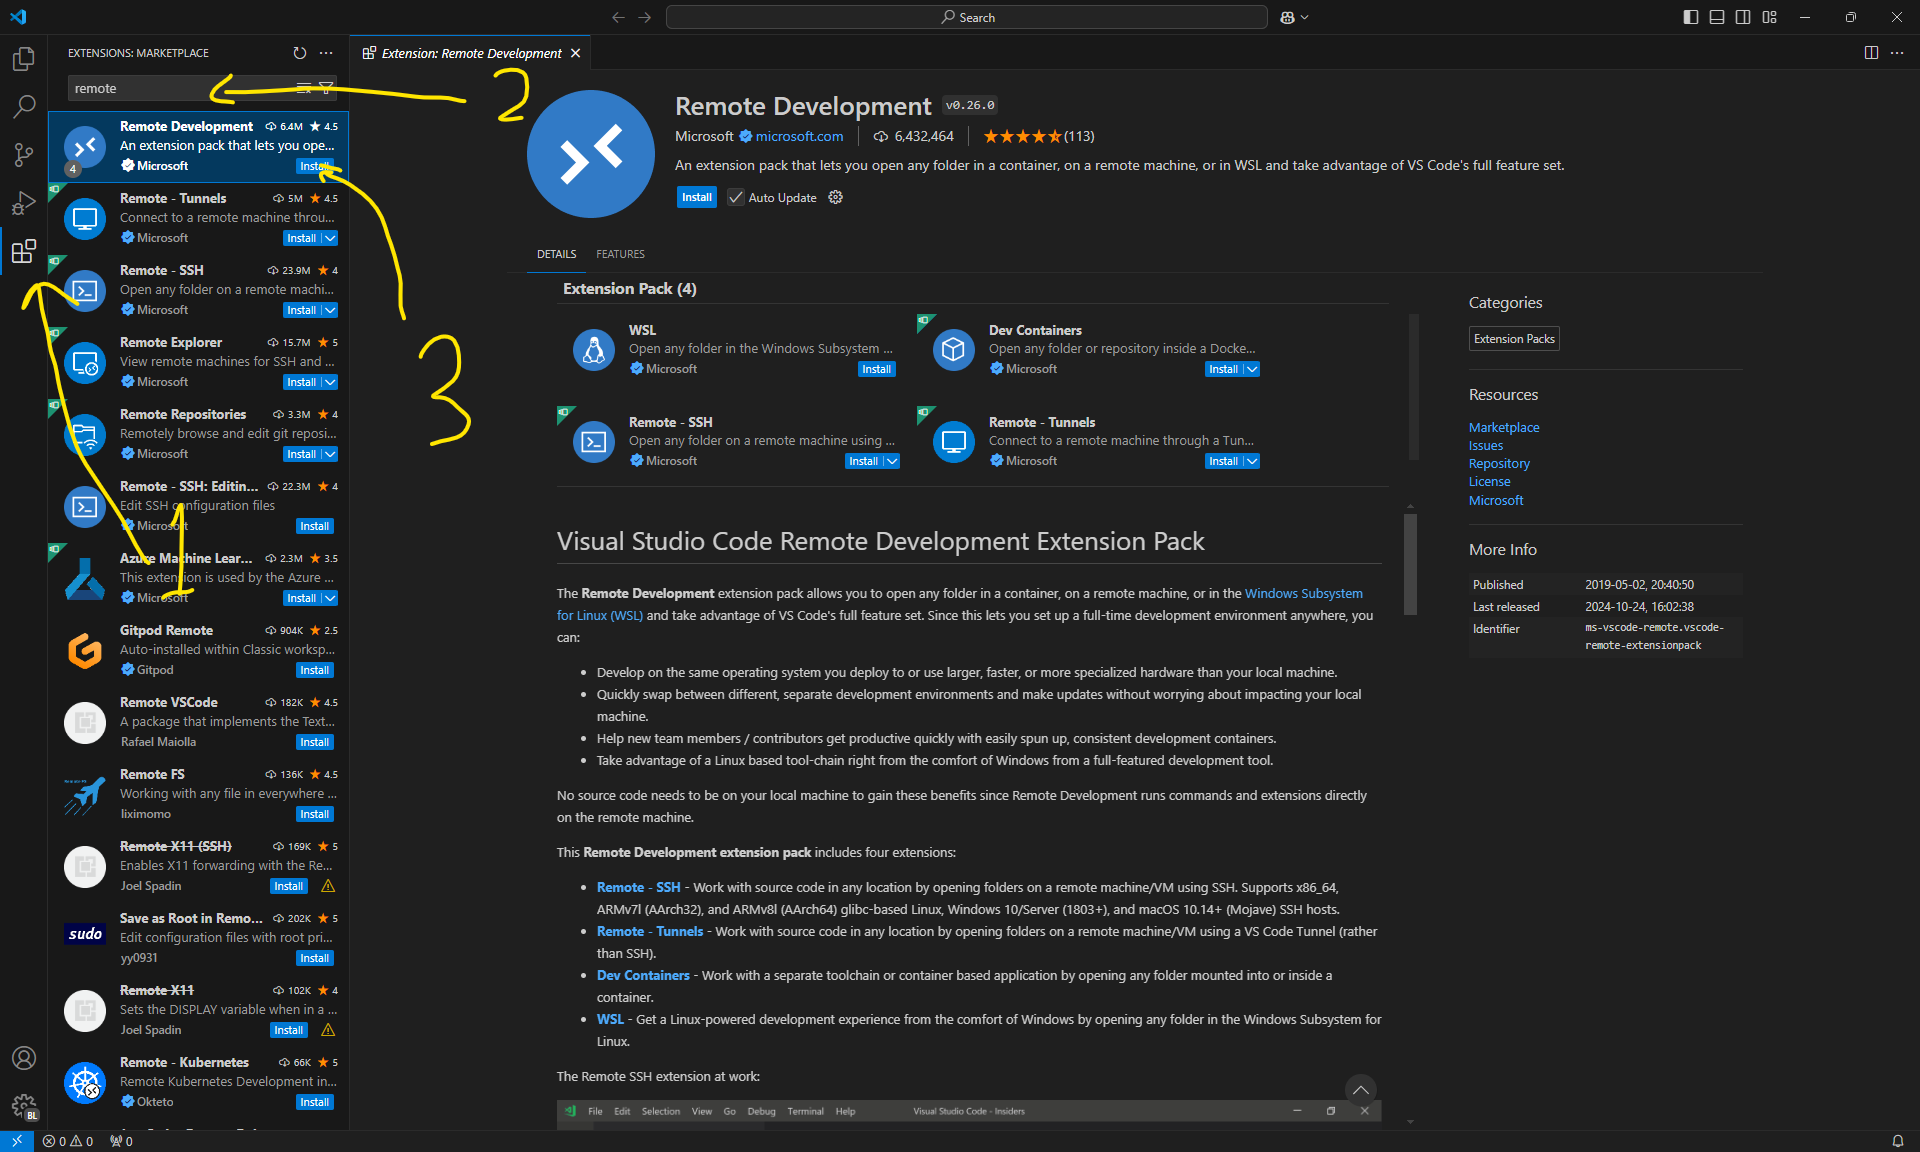
Next, try to connect to the cluster using the extension to see if things are working properly. In this step, we are still connecting to the cluster through the Login Nodes and not the Compute Nodes. The latter is what we set up later. First, initiate VSCode to connect through SSH by clicking on the remote connection button in the bottom left corner.
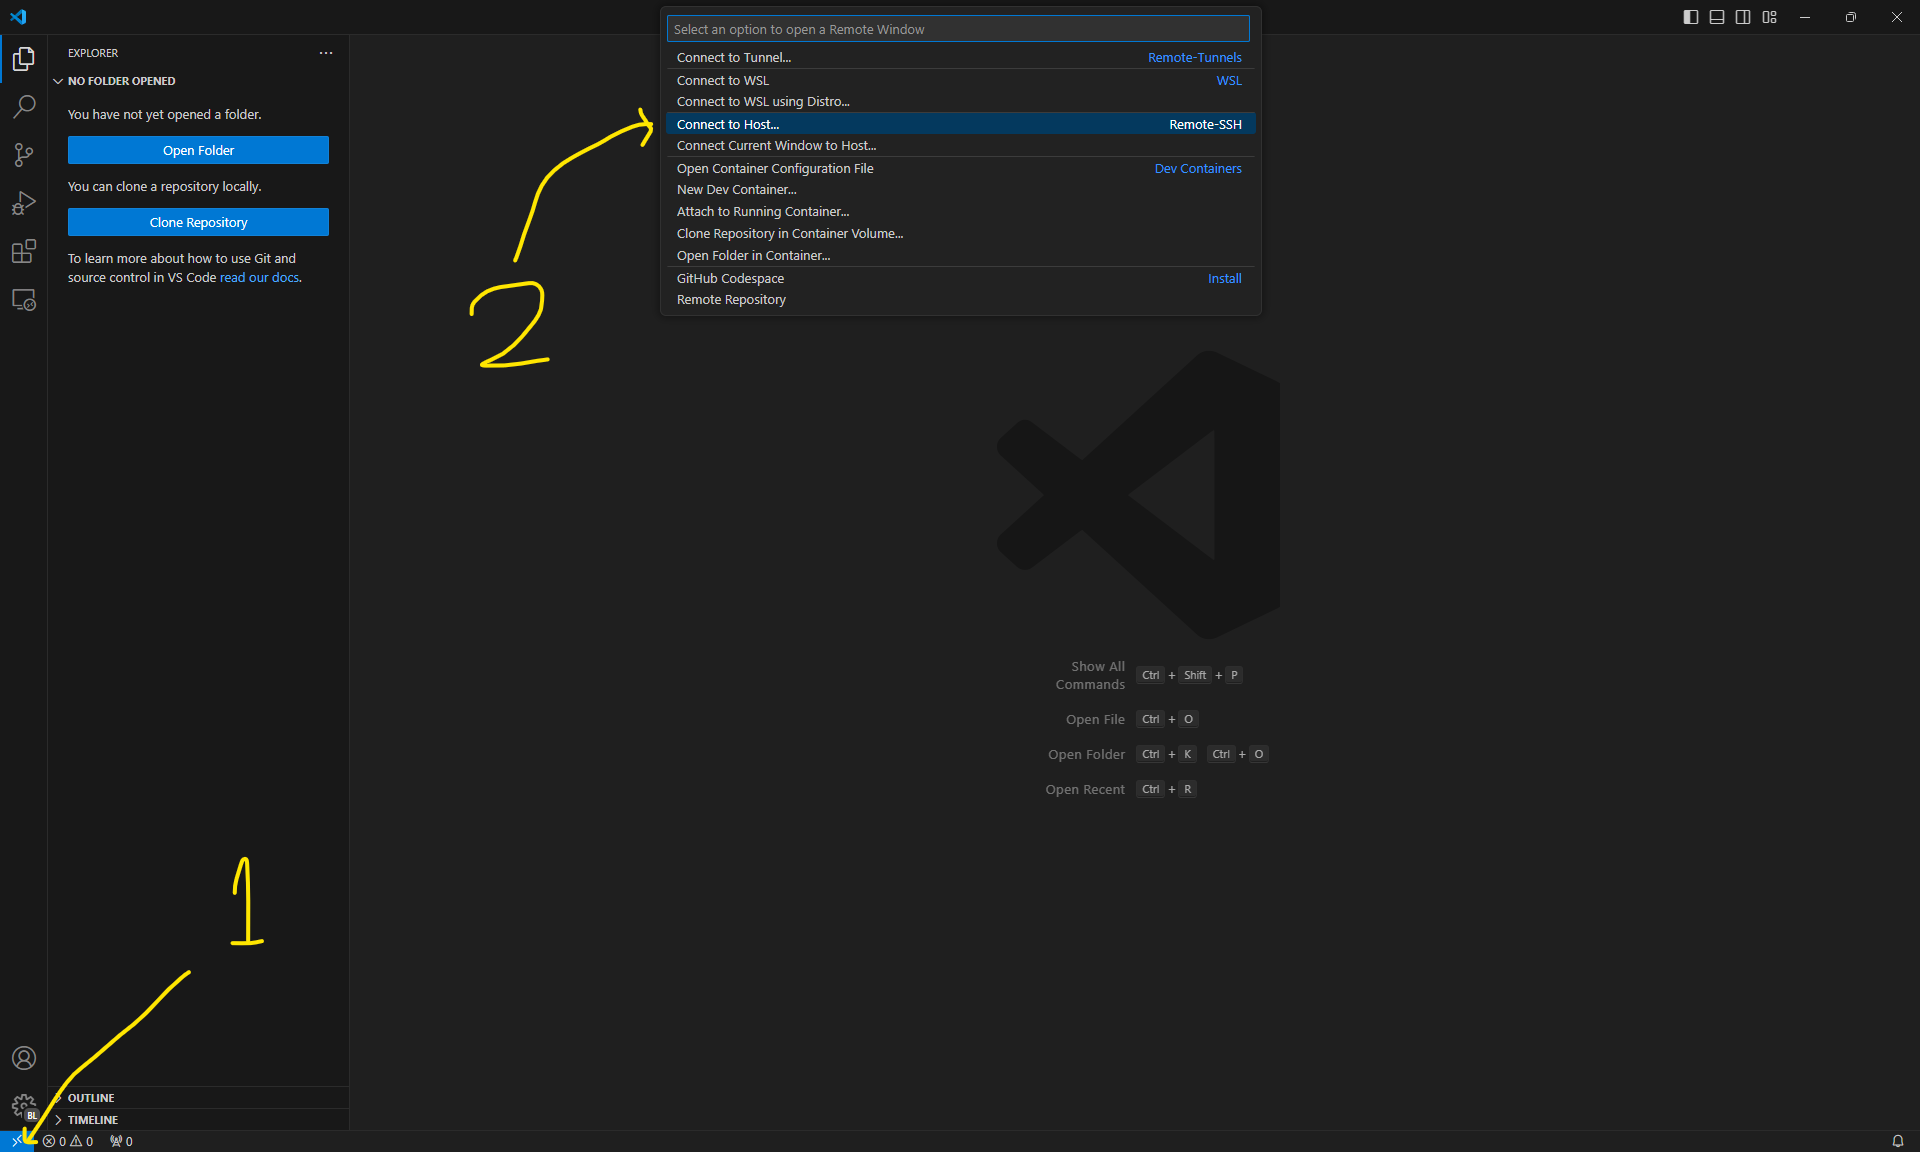
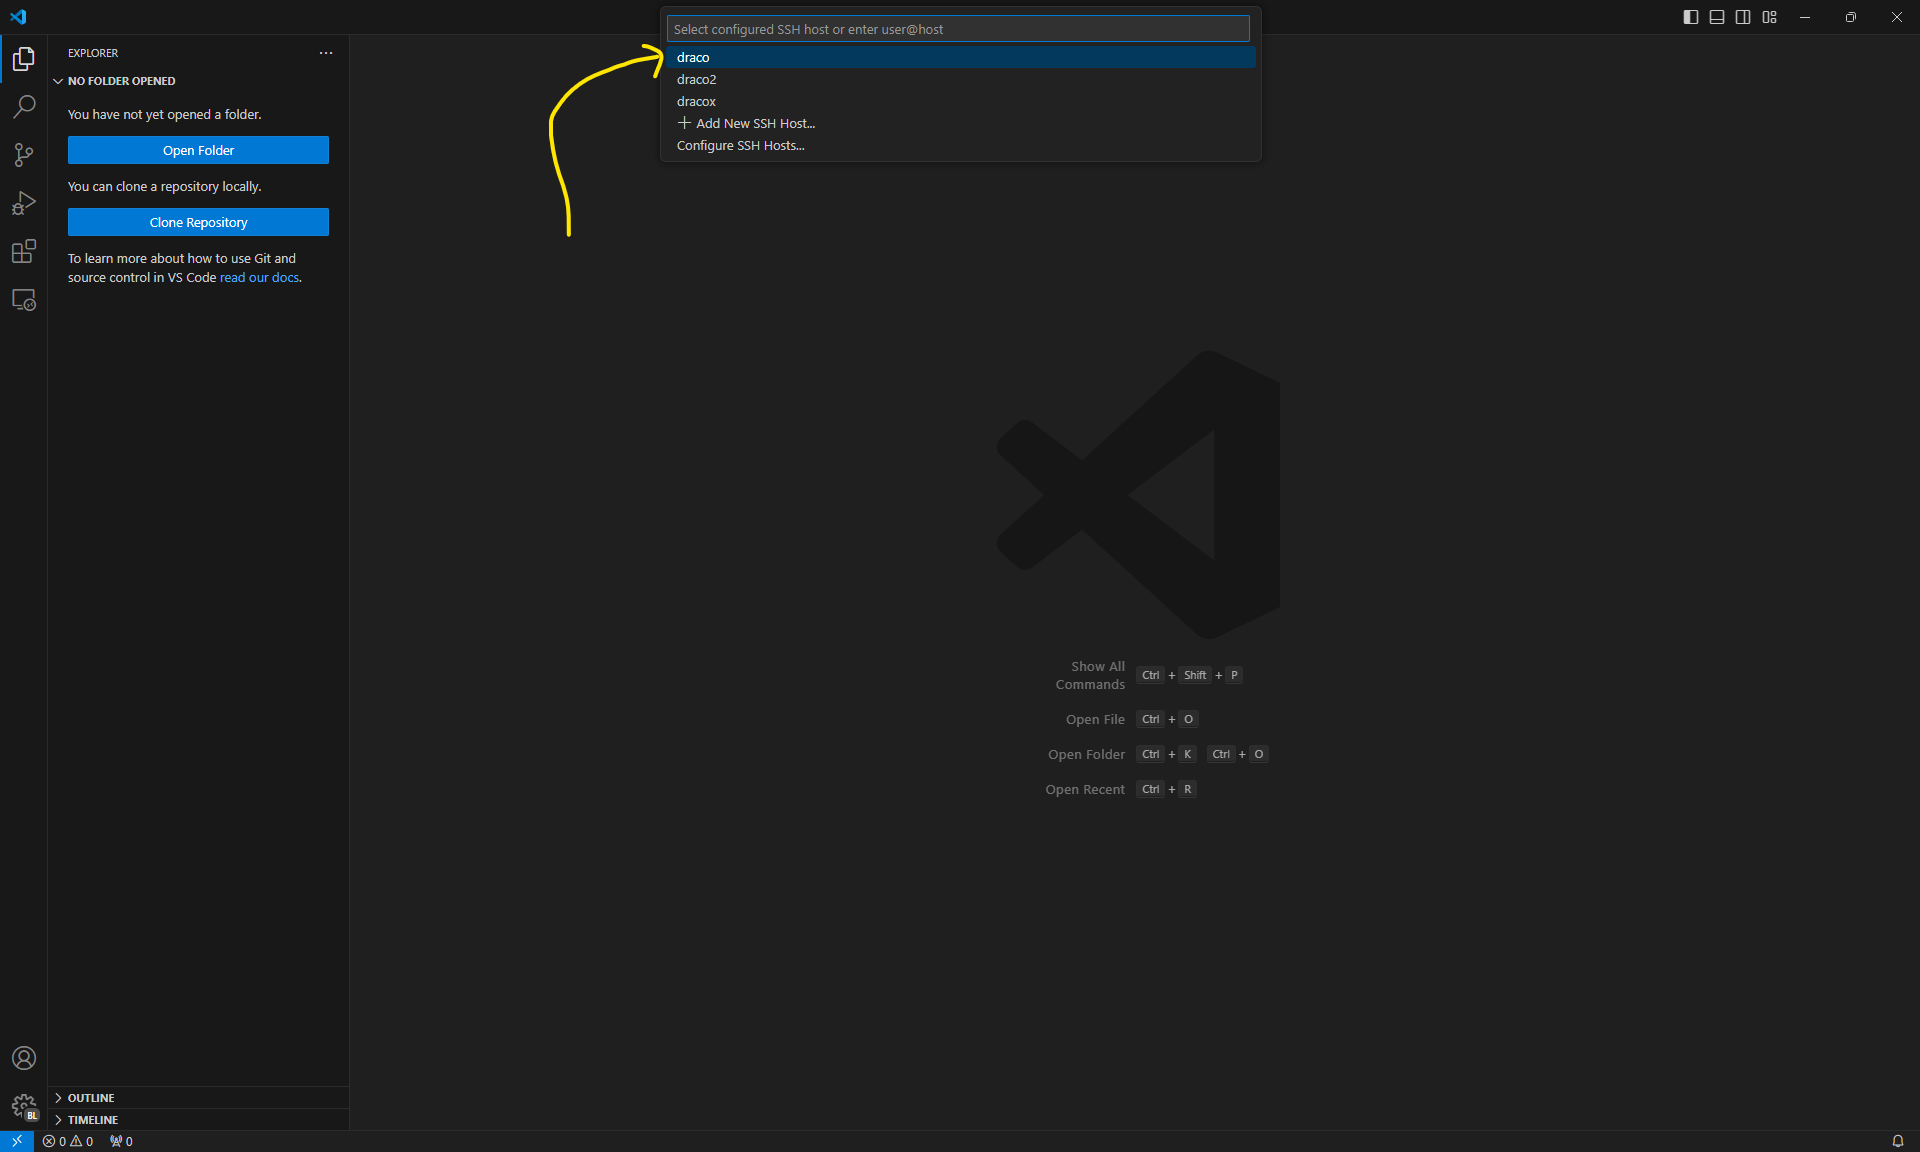
Then choose draco. If you do not see the option draco, it is because you have not defined the host in your local ~/.ssh/config file. This means you need to go back to the steps discussed in the official wiki of the Draco cluster.
After this, VSCode opens up an editor window inside your account in the cluster. You can make sure the window is running in the cluster by seeing SSH: draco written next to the remote connection icon. Finally, you should choose to open a folder from your local directory inside VSCode. Open up your user directory at /home/<username>/.
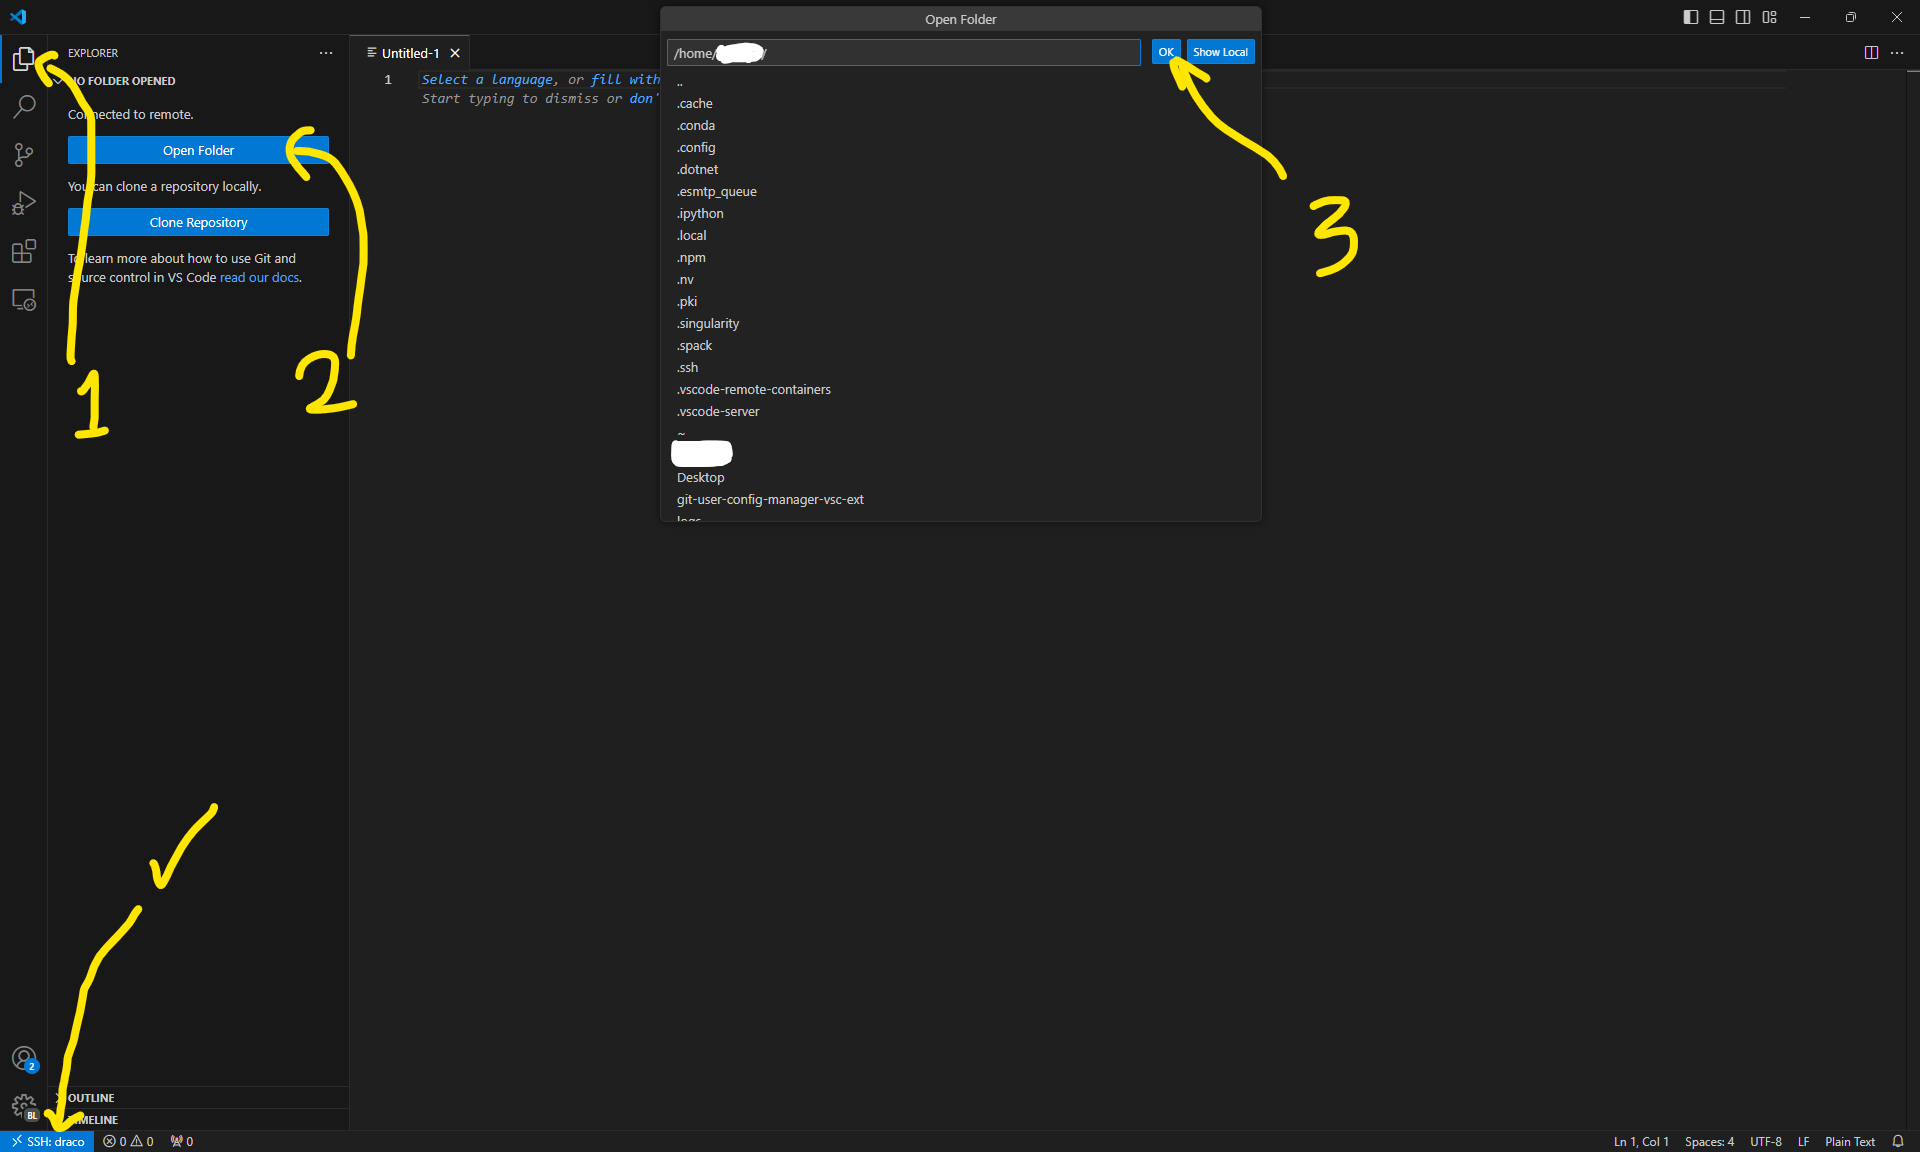
You should now see the content of your user directory in the VSCode’s sidebar.
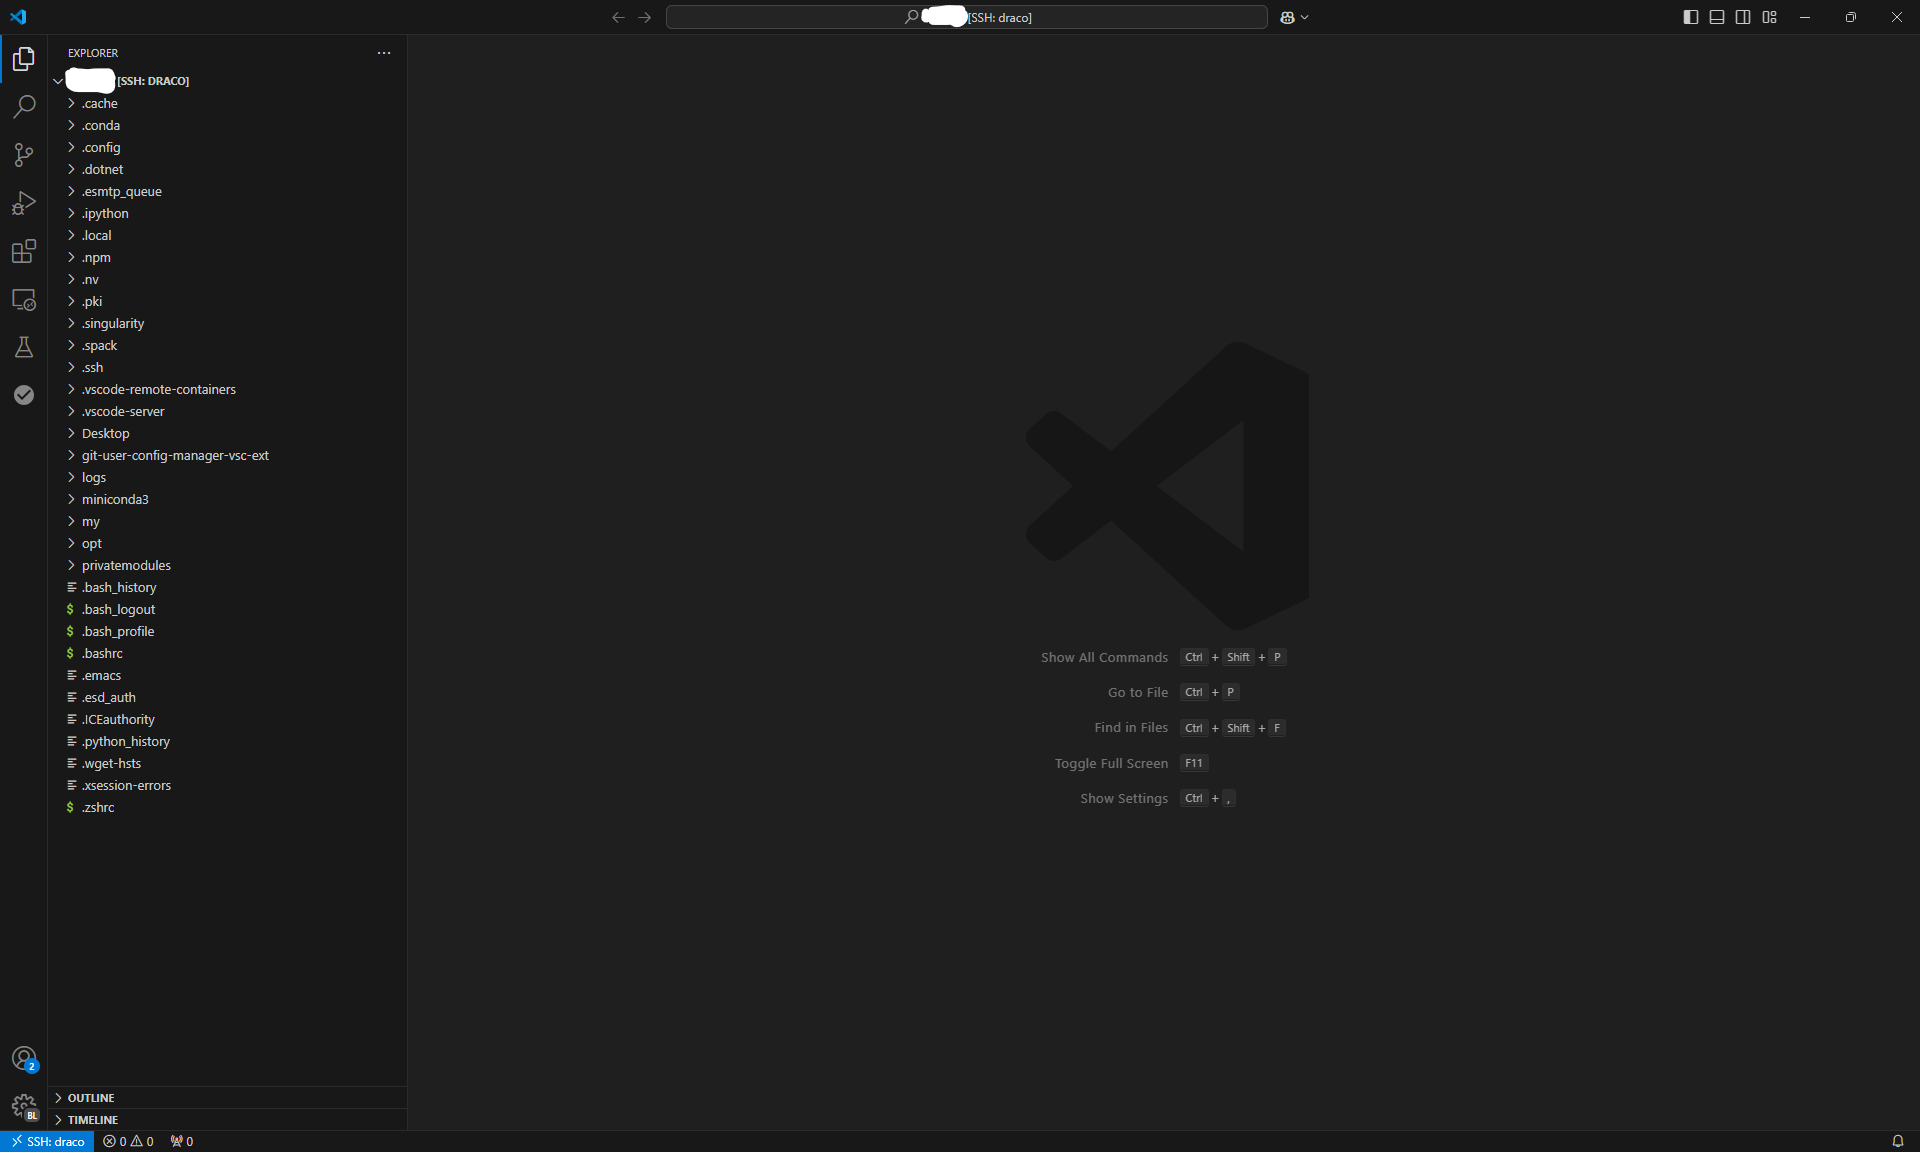
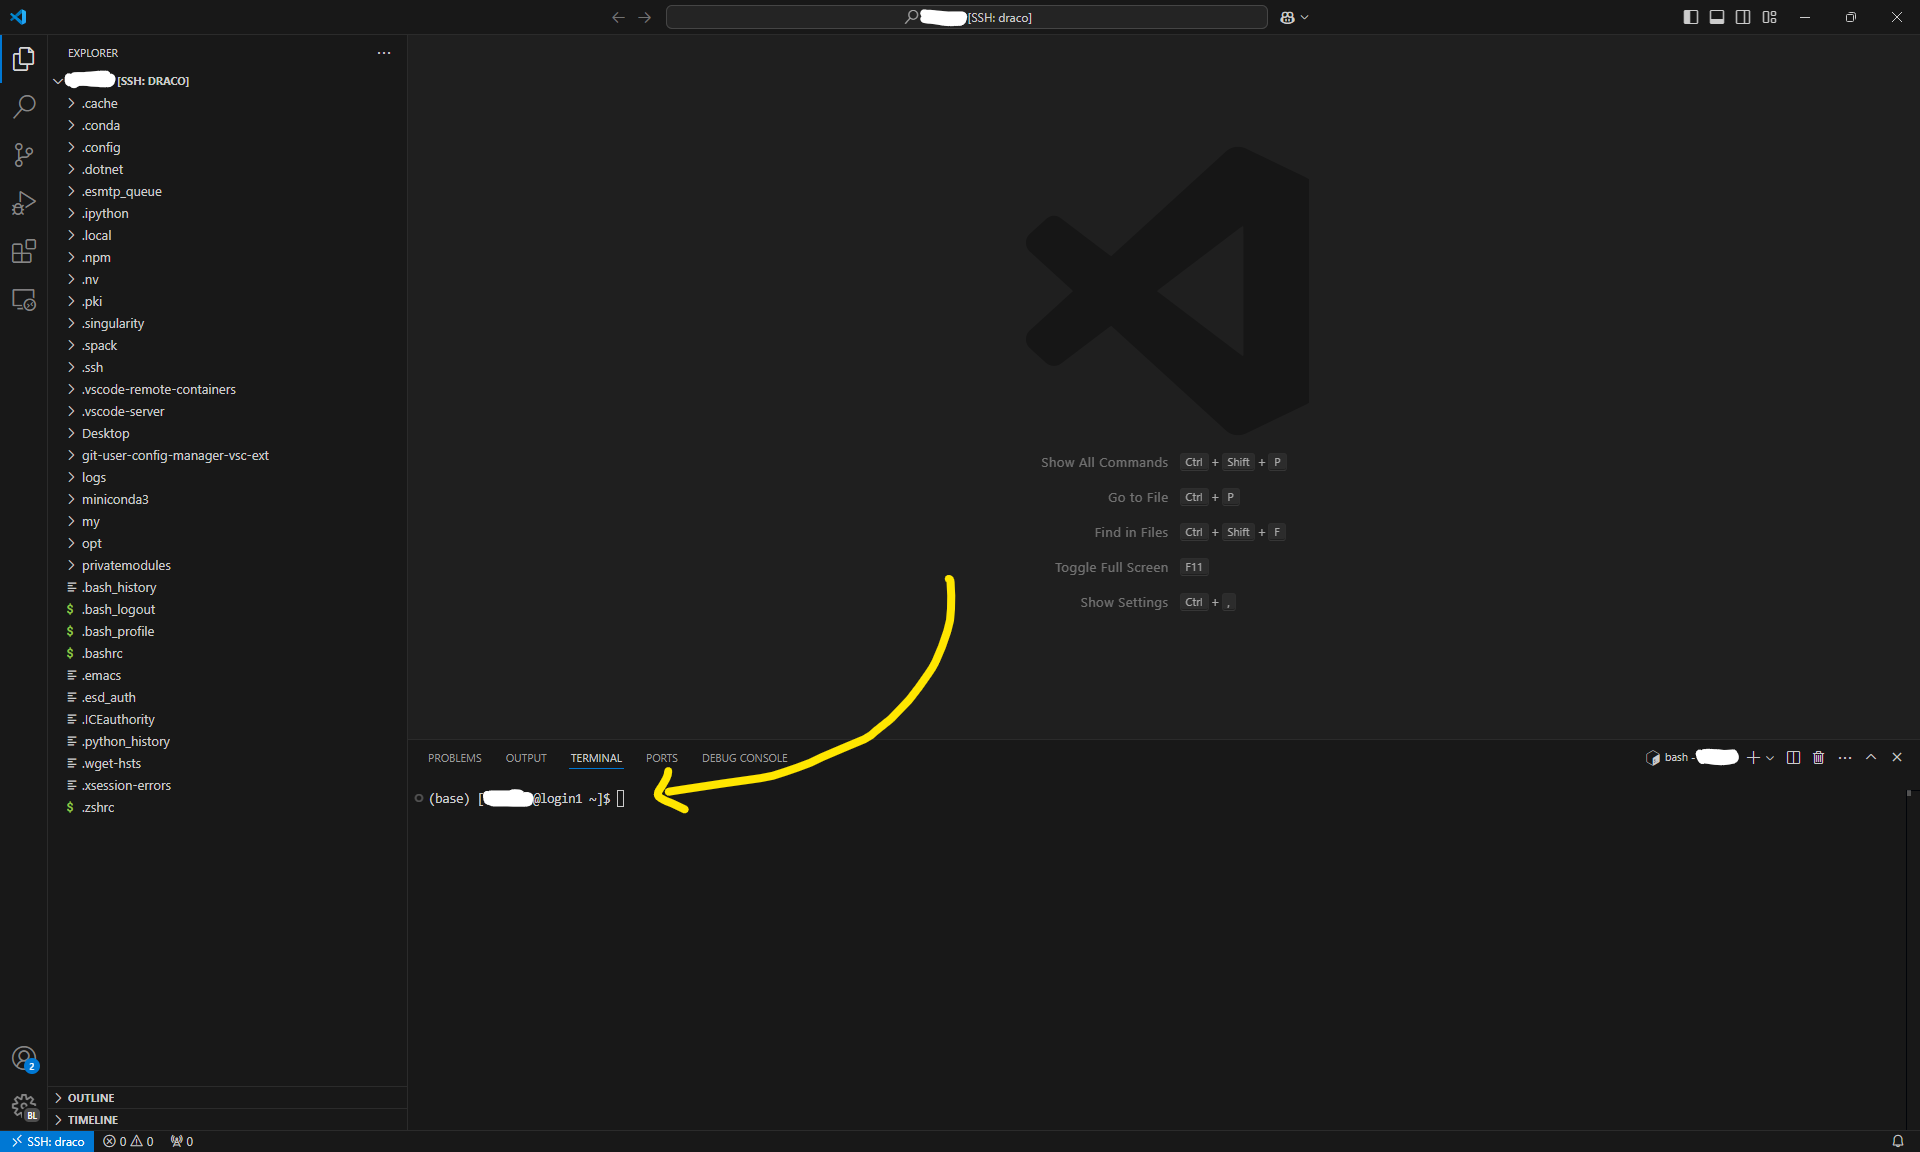
Congratulations! You finished the first step! You can now open up and edit existing files in your directory and add new files directly through VSCode. You can also run commands on the cluster! To see how this works, hit Ctrl+ ` to open up a terminal inside VSCode. This terminal runs on your cluster account through SSH. Or alternatively, right-click on an empty space in the Explorer sidebar and click on Open in Integrated Terminal in the context menu. Right-clicking any directory also gives you the option to open a terminal in that directory! In what comes next, you will need to edit some files and run some commands so hold on tight!
Step 2: Generate a key pair
On the cluster terminal, run the command
ssh-keygen -t rsa -f ~/.ssh/id_rsa_draco_tunnel_sshd -C id_rsa_draco_tunnel_sshd -N ""This will create a key pair id_rsa_draco_tunnel_sshd and id_rsa_draco_tunnel_sshd.pub in your ~/.ssh/ directory. This key will be used to open an SSH server inside a Compute Node so that we can directly connect to it from our computer.
Step 3: Setup and scripts
This step is where we set things up. We will go through all the things you have to do. In summary, you should
- Add a script
compute-session.shwhich runs an SSH session inside a Compute Node. - Create a config file
sshd_configfor the SSH session which we are going to start. - Change your local
~/.ssh/configfile to be able to connect to the Compute Node from your PC/Laptop. - Add aliases to the
~/.bashrcfile to make it easier to run and close the sessions.
Let us start. First create a folder in your home directory to keep things there. Let us call it tunnel and assume it is located at /home/<username>/tunnel/. Create a file there and name it compute-session.sh. Copy the following content to that file and change <username> to yours.
#!/bin/bash

# Job metadata
#SBATCH --job-name tunnel
#SBATCH --output   /home/<username>/tunnel/logs/tunnel.out.%j
#SBATCH --error    /home/<username>/tunnel/logs/tunnel.err.%j

# Resources
#SBATCH --partition=gpu
#SBATCH --nodes=1
#SBATCH --gres=gpu:1
#SBATCH --time=4:00:00

# find an available open port
PORT=$(python3 -c 'import socket; s=socket.socket(); s.bind(("", 0)); print(s.getsockname()[1]); s.close()')

# update job info and add the port to its comment property
scontrol update JobId="$SLURM_JOB_ID" Comment="$PORT"

# start sshd server on the port
/usr/sbin/sshd -D -p ${PORT} -f /home/<username>/tunnel/sshd_config
Details of the flags
-Dmeans thesshdprocess should not be detached to the background and should live as long as the terminal session lives. If the session runs on background, you have to manually close the process after you are done with your work. This might be useful in general SSH sessions of a server but in our special case, we anyways want to run the session temporarily. This means binding the SSH session to the terminal will force the session to close as soon as the terminal closes. This is be better in terms of security.-pspecifies the port at whichsshdwill be listening for incoming connections.-fspecifies the path to the config file.
Next, create the sshd_config file in the same directory with the following content.
# path to the private SSH key
HostKey ~/.ssh/id_rsa_draco_tunnel_sshd

# path to the location where the sshd.pid file will be generated/kept.
PidFile ~/tunnel/generated/sshd.pid
Note
The sshd.pid file is a file that the sshd command generates when it starts the SSH server storing the process ID so that it can safely close it later. Do not modify that file manually!
And finally, you should modify the ~/.ssh/config file on your own computer to enable connection to the Compute Node.
# You should already have the previous draco host definition here
Host draco
	Hostname ...
	User ...
	IdentityFile ...

# Add this new one down below to the config
Host dracox
	ProxyCommand ssh draco "nc $(squeue --me --name=tunnel --states=R -h -O NodeList,Comment)"
	StrictHostKeyChecking no
	User <username>
	IdentityFile <copy the same IdentityFile from the above definition here>
Note
The newly defined dracox host is the one you can use to connect to the Compute Nodes while the SSH session is running on them. The logic behind it is that it connects to the previous draco host, extracts the port which the session in the Compute Node is running on, and connects to that port by proxying through draco. Beautiful!
We are almost done here. At this point, our setup is done and we can initiate the Compute Node session. But because there are a few commands that we are going to be running often, it makes sense to add them to our ~/.bachrc! On the cluster, open up the .bachrc file in your home directory in VSCode and add a few lines to the end.
# ...
# Most likely there are already a few lines up here. Do not change those.
# ...


# But add the following to the end of the file

############################ Aliases for session tunnel
# show my running jobs
alias jobs='squeue --me'
# ask Slurm to run the SSH server inside a compute node
alias start-tunnel='sbatch ~/tunnel/compute-session.sh'
# cancel all running jobs
alias cancela='scancel -u <username>'
############################
Note
The aliases defined are nothing but a more convenient way to run the commands they are assigned to. For example, there will be no difference between running the command jobs or squeue --me on the terminal.
Save the file and close it.
Finale: See it work!
Now close everything (VSCode and the terminals) because we are about to try our new routine! Every time you want to start working, you go through the following steps.
Open a terminal on your private laptop/PC and connect to a Login Node using the command
ssh draco.On the terminal, run the
start-tunnelcommand inside the Login Node. This will instruct Slurm to run the script we wrote inside a Compute Node which starts an SSH server there.Wait for Slurm to start the server. Depending on the resources available on the cluster, this might take a few seconds or minutes. In the meanwhile, you can run the
jobscommand to check the status of the requested job. On the job details, if you seePDon the ST (Status) column, it means the job is still pending and the server is not running yet. Wait for the status to becomeRwhich means the server is running. Keep this terminal open and use it for commands you will need to run inside the Login Node (for example closing the tunnel at the end of your work).When the tunnel starts running, you are able to connect directly to the Compute Node from your local machine through SSH. You can check this by running
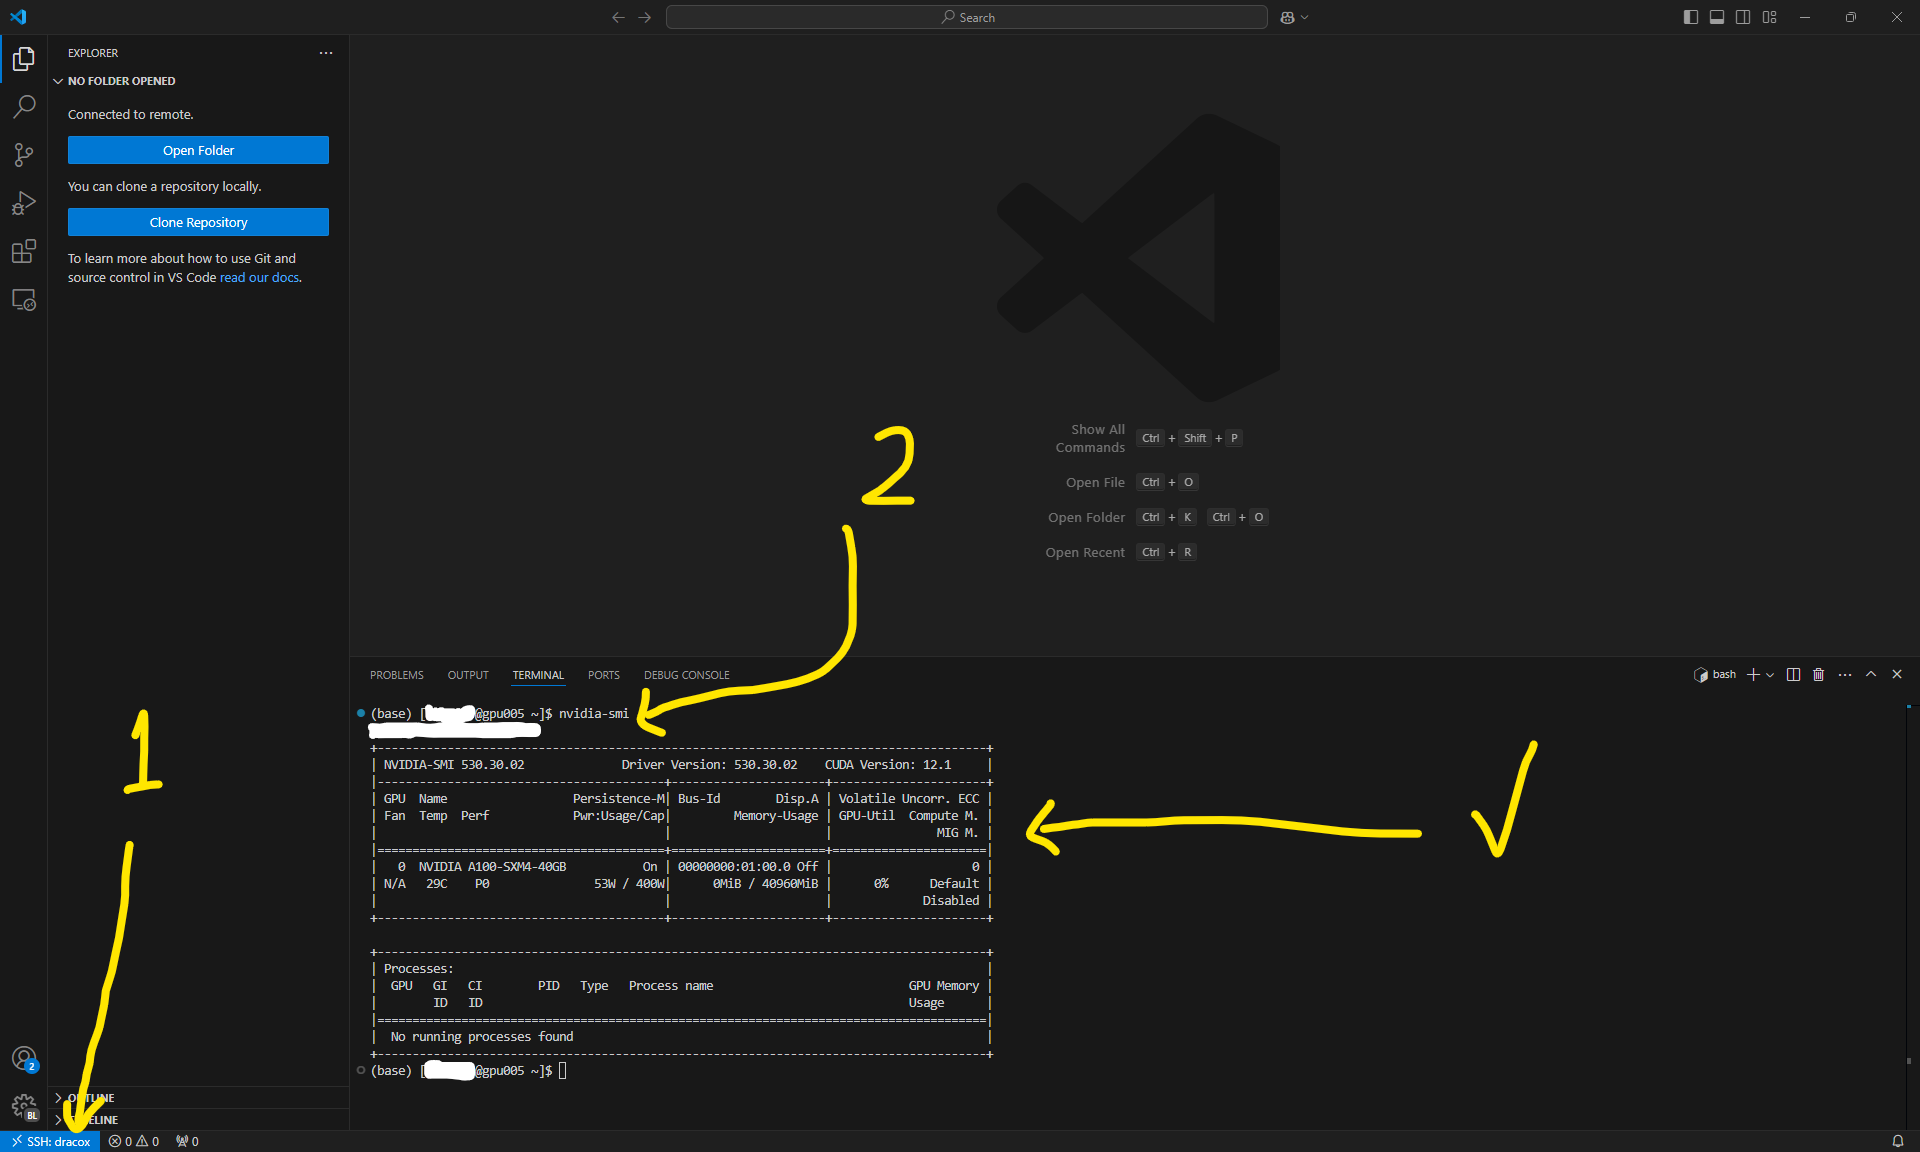
ssh dracoxon a new terminal you open. But the whole point was to be able to connect to the Compute Node through VSCode. To do that, you only need to open up VSCode, open up the SSH remote connection window using the button on the bottom left, and this time choosedracoxas the host. This should open a VSCode window inside the Compute Node. To check you are inside the Compute Node, you can open a terminal in VSCode and see[<username>@gpuXXX ~]$in your terminal wheregpuXXXis the node you are in! To check you actually have access to the GPUs, you can runnvidia-smiin the terminal and you should see the details of the GPUs available to you. From now on, whatever you do inside this VSCode window will run in the Compute Node your are connected to. You can install extensions to run Jupyter Notebooks for example. You have access to the whole power of VSCode and the cluster!
- When you are done with your work, run
cancelaon the terminal you had connected to the Login Node to close the SSH Server previously opened via Slurm. You can make sure it is closed by checking the output of thejobscommand. Now everything is cleanly closed and your work is done with the session!
The setup looks like this.
The better way to connect to high-power nodes of the Draco cluster.
Final words
The part that asks for resources from Slurm is located in the compute-server.sh script. Change this file to choose the resources you are asking for. In that script, you see a comment-like section as
#SBATCH --partition=gpu
#SBATCH --nodes=1
#SBATCH --gres=gpu:1
#SBATCH --time=4:00:00
which asks for 1 node from the gpu partition for 4 hours. The gres=gpu:1 line means you need access to one GPU; you can increase that if you need. You can ask the cluster administrators or check out the official overview of the systems and the tutorial on running jobs to know more about available options and partitions. The time option is particularly important because your session will be limited to that time and after that the server you started in the Compute Node will be closed. So choose that based on your needs and make sure you save any progress before the tunnel closes. You should not change the nodes=1 option because for the SSH connection to work, you need to be connected to only one node and no more.
One other interesting option is #SBATCH --mem=8G which specifies the amount of RAM you would like to have. You might find this one useful and you can add it to the compute-server.sh script. When you change any of these options, you have to close the tunnel and reopen it for the changes to take effect.
Have fun computing!
Inspired by: